How to trade breakouts without buying the false ones
Most breakouts fail, and the ones that succeed usually let you in on the retest. Here is how to separate real breaks from stop-hunts, where to place the stop, and how to size the trade.
Breakout trading is the most intuitive strategy in forex: price breaks a level, you buy the momentum, and the move extends. The intuition is correct — real breakouts do extend, and they are where the market's biggest trends begin. The problem is the failure rate. At obvious levels, most breaks are not real; they are stop-hunts, liquidity grabs and false starts that reverse within candles.
What separates careful breakout traders from everyone else is not better levels. It is the discipline of waiting for the market to prove the break before committing. This guide explains why breakouts fail, what a real one needs, and how to build a breakout plan that buys the genuine move instead of the fake one.
Why most breakouts fail
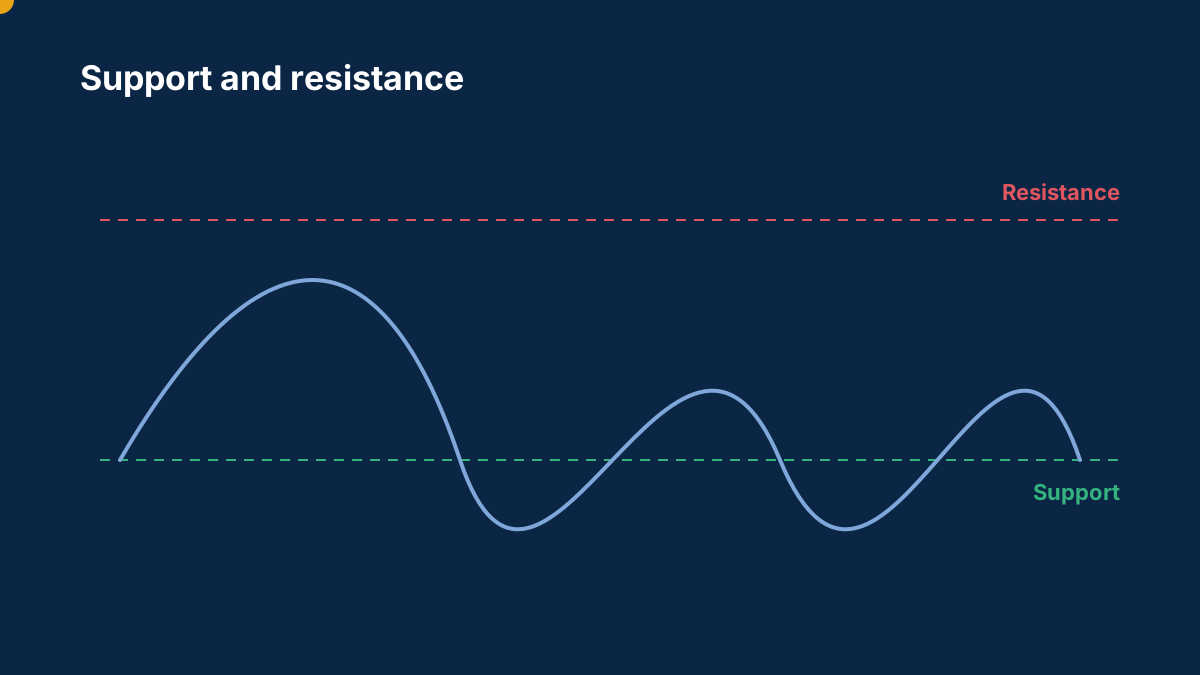
Breakouts fail for a structural reason: obvious levels attract orders. Buy stops cluster above resistance and sell stops below support, because that is where every textbook says to place them. When price approaches the level, the liquidity of those clustered stops becomes the target — price runs through the level, triggers the stops, and reverses once the liquidity is consumed. The break looks real for exactly as long as it takes to collect the orders.
The practical consequence is that the first break of an obvious level is the least trustworthy, not the most. The market has to prove the break by holding beyond the level, and the proof takes time and structure. Support and resistance explained covers the level mechanics underneath this behaviour.
What a real breakout needs
A real breakout has three components, and a plan should require all three:
A meaningful level. The break matters in proportion to the level it breaks. A level tested many times, on a higher time frame, or combined with a round number or a trend line, produces a more significant break than a random intraday high. Levels with a history are the ones institutions watch, and their breaks are the ones that extend.
Context in its favour. The best breakouts happen when the break agrees with the bigger picture: the daily trend, the session's direction, the macro story. A break against the higher-time-frame trend is fighting the current, and most of them lose.
A successful retest. This is the single most valuable filter in breakout trading. After the break, price often returns to the broken level. If the level holds — the broken resistance now acting as support — the break is confirmed by the market's own behaviour. Entering on the retest costs a few pips and buys a large reduction in false breaks. The flip mechanics are in support and resistance.
The retest trade, step by step
The workable breakout trade is really a retest trade:
- Mark the level in advance — it must be visible before the break, not drawn afterwards.
- Let price break it. Do nothing.
- Wait for the return to the level. Do nothing until it arrives; if it never comes, the trade is simply not taken.
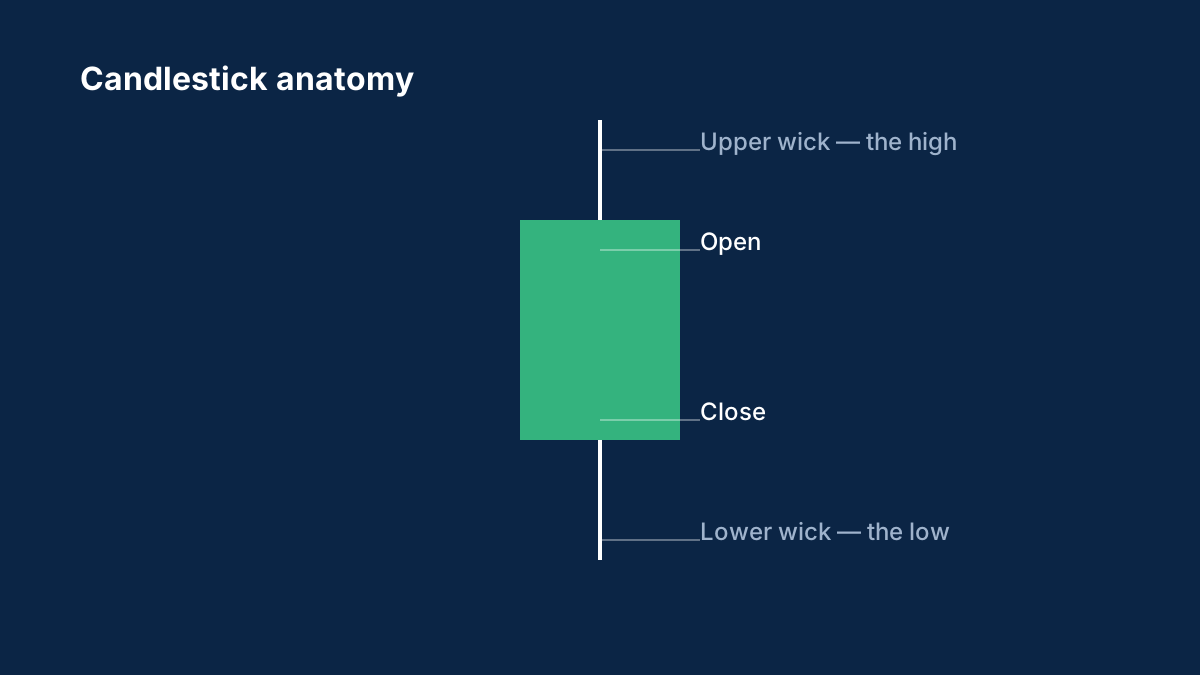
- On the retest, wait for a rejection signal: a wick, an engulfing candle, a failed re-break. Candlestick charts explained decodes the rejection signatures.
- Enter in the direction of the break, stop beyond the level (or beyond the rejection's extreme), target the measured move or the next marked level.
The cost of waiting is real: some breakouts never retest and run away. The benefit is larger: the breakouts you do take are the ones the market confirmed, and their failure rate is a fraction of the raw break's.
Where the stop goes
The stop's job on a breakout trade is to prove the break was fake. That means it sits on the other side of the broken level — beyond the level, or beyond the retest's rejection wick, with a small buffer. A stop placed inside the new range dies of noise; a stop placed a fixed number of pips away ignores the structure that defines the trade. The anchor logic is in where to place a stop-loss.
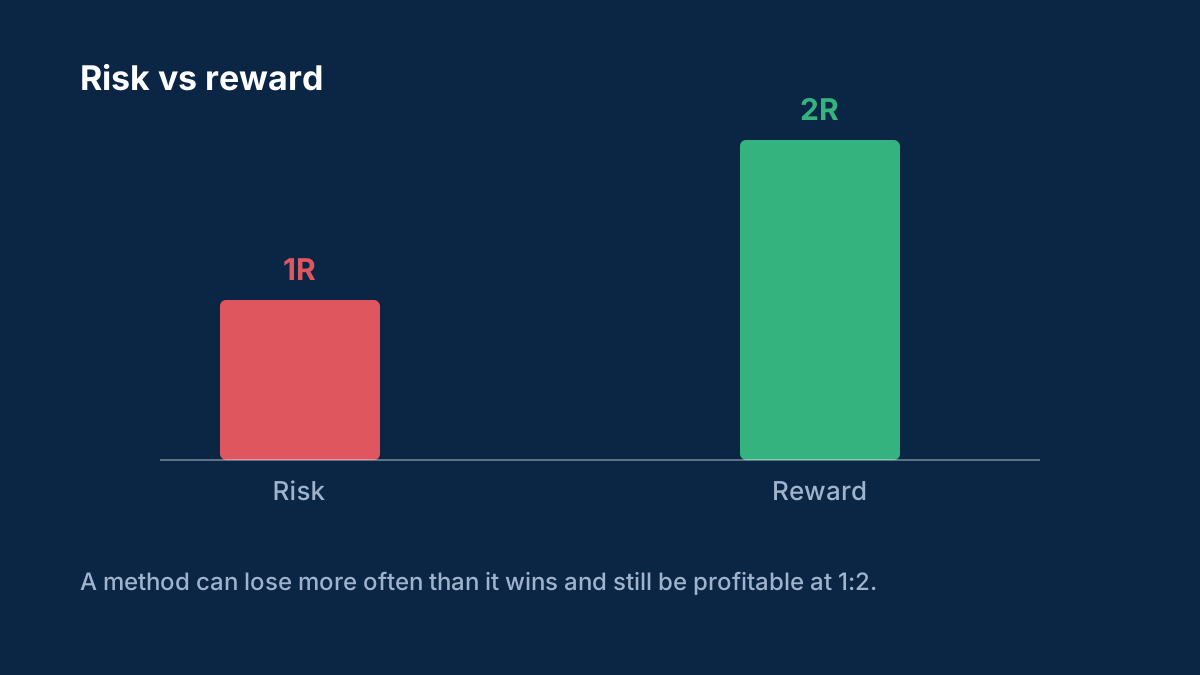
One structural note: breakout stops are wide by nature, because they must survive the level's retest. The wider stop is not a problem if the position is sized for it — risk-first sizing converts any stop distance into a safe position. Position sizing and risk per trade has the arithmetic.
Sizing for the break
Breakout trades carry a specific risk: the entry is near the level, so the stop is near the level, and if the break fails, the loss arrives quickly and fully. The defence is the same as everywhere else — fix the risk per trade as a small percentage of the account, and let the position size fall out of the stop distance. The traders who get hurt on breakouts are not the ones who misread the level; they are the ones who sized the trade by conviction instead of by risk.
The failed break as a trade itself
The false breakout is not just a hazard — it is one of the market's best contra signals. When price breaks a level, fails, and closes back inside the range, the failure tells you where the real orders were. The failed break often produces a fast move in the opposite direction, because everyone who bought the break is now wrong and must exit. Many traders build a complete strategy around this: wait for the break to fail, then trade the reversal back through the level.
The rules mirror the retest trade: the failure must be confirmed by a close back inside the range, the stop sits beyond the false break's extreme, and the target is the opposite side of the range. The risk-reward and expectancy guide shows how to test this pattern properly before trusting it.
The mistakes that define breakout trading
Three mistakes repeat across every losing breakout trader's history. Buying the first break — the stop-hunt break — instead of the retest. No confirmation — treating every poke through a level as a trade. Stops inside the range — placing the stop where normal noise reaches it instead of beyond the structure. Each mistake is a decision to skip the proof the market was offering, and each is fixed by the same discipline: mark the level in advance, wait for the retest, and let the structure place the stop.
Breakout trading rewards patience with unusual clarity: the levels are visible, the rules are testable, and the market itself tells you when the break is real. Skip the first break, trade the confirmation, and the market's most famous setup stops being its most famous trap.
Sources
Common questions
What is a false breakout?
A false breakout is when price moves beyond a level, triggers the stops clustered there, and then reverses back through the level. Most first breaks of obvious levels are false, which is why confirmation matters.
What is a breakout retest?
After a genuine break, price often returns to the broken level, which now acts as support or resistance. A retest that holds confirms the break and offers the lower-risk entry.
Where should I place a stop on a breakout trade?
Beyond the broken level, or beyond the retest's rejection wick, with a small buffer. The stop proves the break was fake, so it must sit on the other side of the level.
Should I buy the first break of a level?
Usually not. The first break is the most likely to be a stop-hunt. Waiting for the retest to hold — or for the break to fail — filters out most false breaks.
What makes a breakout more likely to succeed?
A meaningful level with history, a break that agrees with the higher-time-frame trend and the session's direction, and a retest that holds. All three together make the strongest case.
This article is for information only and is not financial advice. Trading forex and CFDs carries a high risk of losing money. Read the risk warning. Spotted an error? Tell the editors.
Comments
Log in to join the discussion. Comments follow the community guidelines.
Log in to commentLoading comments…